Chocolate Mint Truffle Kiss Cookies Recipe
Introduction
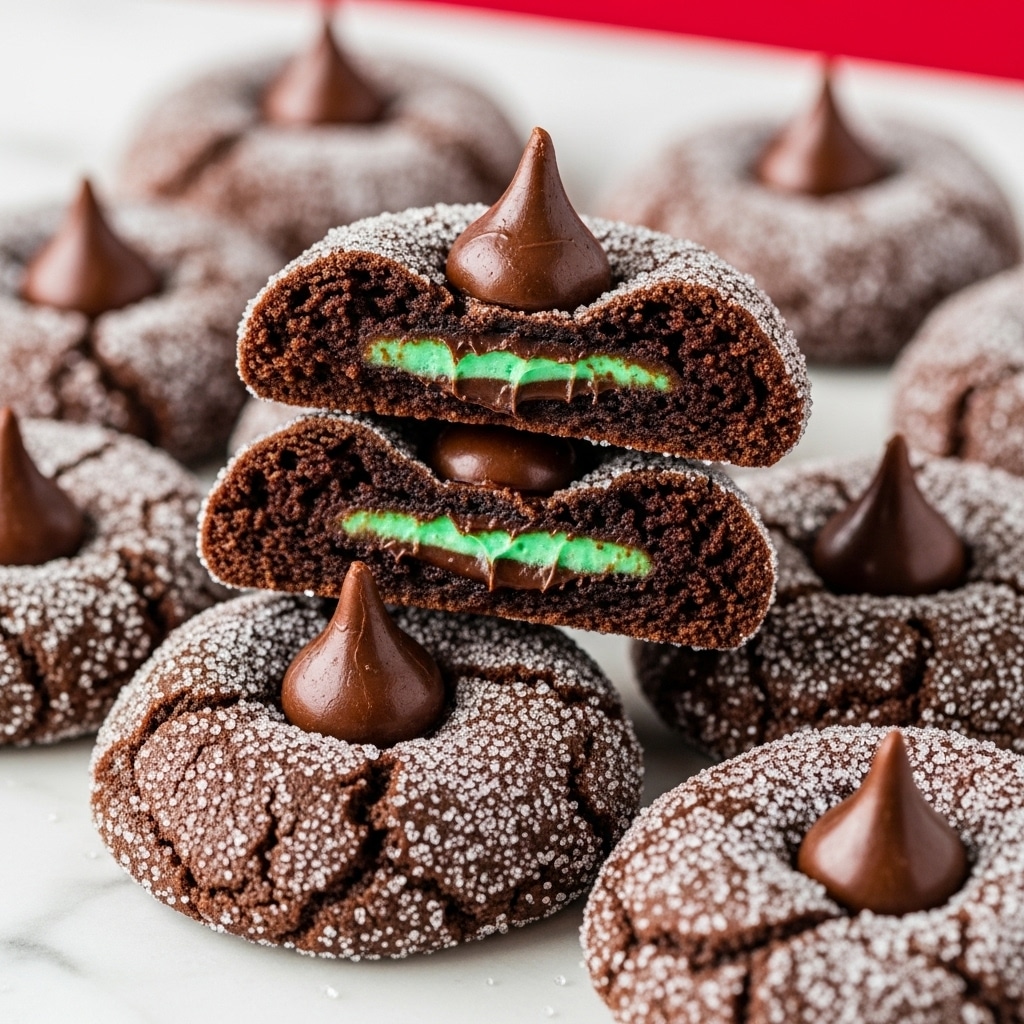
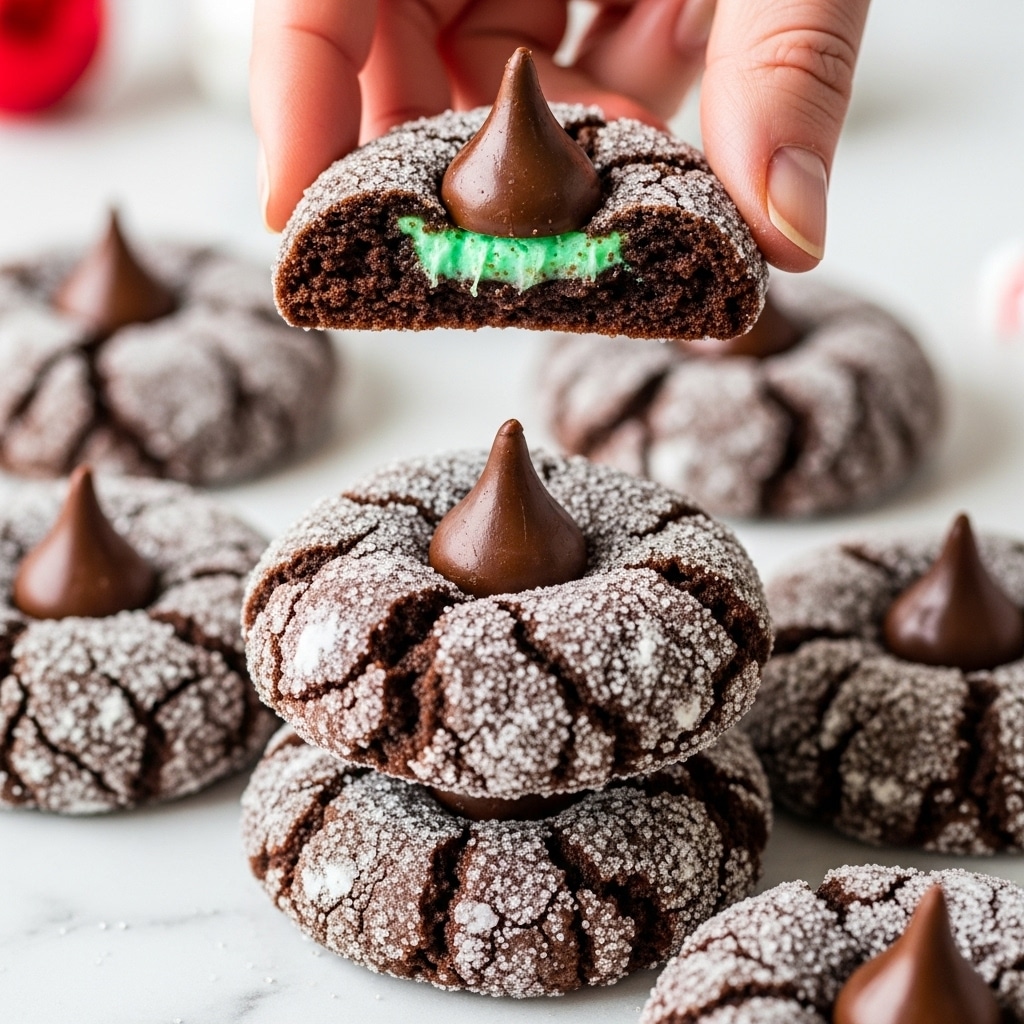
These Chocolate Mint Truffle Kiss Cookies are a delightful blend of rich cocoa and refreshing peppermint. Each cookie is topped with a melt-in-your-mouth mint Hershey Kiss, making them a perfect treat for chocolate and mint lovers alike.
Ingredients
- 3 cups flour
- 1 cup unsweetened cocoa powder
- 1 tsp baking soda
- 1 tsp baking powder
- 1/2 tsp salt
- 1 cup granulated sugar
- 1 cup packed brown sugar
- 1 cup Imperial margarine, room temperature
- 2 eggs, room temperature
- 1 tsp vanilla extract
- 1/4 tsp peppermint extract (do NOT use regular mint)
- 1/2 cup granulated sugar (for rolling)
- About 60 unwrapped mint Hershey Kisses (or 30 if using a medium cookie scoop)
Instructions
- Step 1: Preheat your oven to 375°F (190°C) and line two large baking sheets with parchment paper. Avoid silicone mats as they can cause spreading.
- Step 2: In a mixing bowl, whisk together the flour, cocoa powder, baking soda, baking powder, and salt until well combined.
- Step 3: In a separate mixer bowl, cream the granulated sugar, brown sugar, and margarine together for 3–4 minutes until fluffy.
- Step 4: Beat in the eggs, vanilla extract, and peppermint extract until fully incorporated.
- Step 5: Gradually add the dry ingredients to the wet mixture, mixing just until combined. Scrape down the sides of the bowl as needed.
- Step 6: Pour the additional 1/2 cup granulated sugar into a small bowl. Using a small 1-tablespoon cookie scoop, scoop the dough and immediately roll each ball in the sugar until well coated.
- Step 7: Place the coated dough balls onto the prepared baking sheets, spacing them about two inches apart.
- Step 8: Bake for 8–9 minutes at 375°F. While the cookies bake, unwrap the mint Hershey Kisses.
- Step 9: Remove the cookies from the oven and immediately press an unwrapped Kiss into the center of each cookie.
- Step 10: Let the cookies sit on the baking sheets for about 10 minutes before transferring them gently to a cooling rack to cool completely.
Tips & Variations
- Use peppermint extract specifically, as regular mint extract can taste overpowering or artificial.
- For larger cookies, use a medium cookie scoop and adjust baking time accordingly.
- If you want a softer cookie, slightly underbake them and allow residual heat to finish the cooking.
- Try rolling the dough balls in colored sugar for a festive touch during holidays.
- For a richer flavor, consider using butter instead of margarine.
Storage
Store the cookies in an airtight container at room temperature for up to 5 days. To keep the kisses from melting or sticking, layer cookies with parchment paper. Reheat gently in a microwave for 5–10 seconds if you want the chocolate soft again.
How to Serve
Serve this delicious recipe with your favorite sides.
FAQs
Can I substitute butter for margarine?
Yes, you can use an equal amount of butter instead of margarine. Butter will add a richer flavor but may slightly affect the texture.
Why should I not use regular mint extract?
Regular mint extract often has a stronger or artificial flavor that can overpower the chocolate. Peppermint extract provides a cleaner, brighter mint note that’s perfect for these cookies.
PrintChocolate Mint Truffle Kiss Cookies Recipe

These Chocolate Mint Truffle Kiss Cookies combine rich cocoa-flavored cookie dough with the refreshing taste of peppermint and the indulgent surprise of a mint Hershey Kiss pressed into the center. The cookies are rolled in sugar before baking to create a slight crisp exterior, then topped with a creamy mint chocolate truffle for a festive and delightful treat perfect for holiday gatherings or anytime you crave a mint-chocolate twist.
- Prep Time: 15 minutes
- Cook Time: 9 minutes
- Total Time: 34 minutes
- Yield: About 60 cookies 1x
- Category: Dessert Cookie
- Method: Baking
- Cuisine: American
Ingredients
Dry Ingredients
- 3 cups flour
- 1 cup unsweetened cocoa powder
- 1 tsp baking soda
- 1 tsp baking powder
- 1/2 tsp salt
Wet and Sugars
- 1 cup granulated sugar
- 1 cup packed brown sugar
- 1 cup Imperial margarine, room temperature
- 2 eggs, room temperature
- 1 tsp vanilla extract
- 1/4 tsp peppermint extract (do NOT use regular mint extract)
- 1/2 cup granulated sugar (for rolling)
Topping
- About 60 unwrapped mint Hershey Kisses (or 30 if using a medium cookie scoop)
Instructions
- Preheat and Prepare Pans: Preheat your oven to 375°F (190°C). Line two large baking sheets with parchment paper, taking care to avoid silicone mats as they can cause cookies to spread more than desired.
- Mix Dry Ingredients: In a mixing bowl, whisk together the flour, unsweetened cocoa powder, baking soda, baking powder, and salt to evenly distribute all the dry ingredients.
- Cream Sugars and Margarine: In your mixer bowl, cream together the granulated sugar, brown sugar, and Imperial margarine at room temperature for 3 to 4 minutes until light and fluffy.
- Add Eggs and Extracts: Beat in the eggs one at a time along with the vanilla extract and peppermint extract until the mixture is well combined and smooth.
- Combine Wet and Dry: Gradually add the dry ingredients to the wet mixture, mixing until just combined. Scrape down the sides of the bowl as necessary to ensure even mixing, but avoid overmixing the dough.
- Coat Dough in Sugar: Pour the additional 1/2 cup of granulated sugar into a small bowl. Using a small 1 tablespoon cookie scoop, portion the dough and drop it directly into the sugar. Roll each dough ball around with your fingers until well coated.
- Arrange Dough on Pans: Place the coated dough balls on the prepared baking sheets about two inches apart to allow space for spreading.
- Bake Cookies: Bake in the preheated oven for 8 to 9 minutes until set but still soft in the center. While baking, unwrap all your mint Hershey Kisses to prepare for topping.
- Add Kisses to Cookies: Immediately upon removing the cookies from the oven, press an unwrapped mint Hershey Kiss into the center of each warm cookie to allow it to slightly melt and adhere.
- Cool Cookies: Allow the cookies to sit on the baking sheets for about 10 minutes to firm up, then gently transfer them to a wire cooling rack. Let cool completely before serving or storing.
Notes
- Use Imperial margarine for the best spread and texture; other margarines or butter might change cookie spread and flavor.
- Do not substitute regular mint extract; peppermint extract gives the distinct flavor that complements the chocolate.
- Silicone baking mats can cause cookies to spread more, so parchment paper is recommended.
- Rolling the dough balls in granulated sugar before baking gives the cookies a slightly crisp exterior.
- Make sure cookies are warm when adding the Hershey Kisses so the chocolate can slightly melt for better adhesion.
- If using a medium cookie scoop, reduce the number of kisses accordingly.
Keywords: Chocolate Mint Cookies, Hershey Kiss Cookies, Holiday Cookies, Mint Chocolate Dessert, Cocoa Cookies