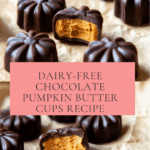
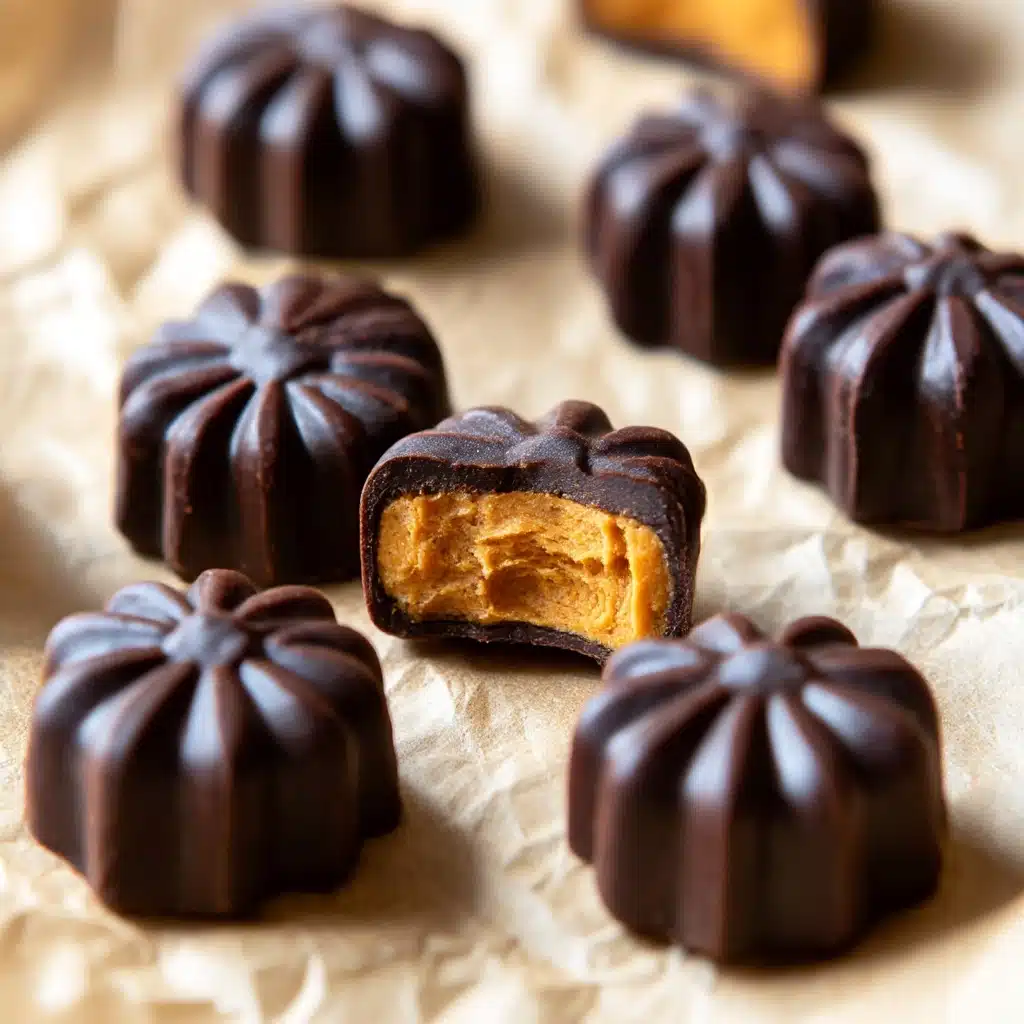
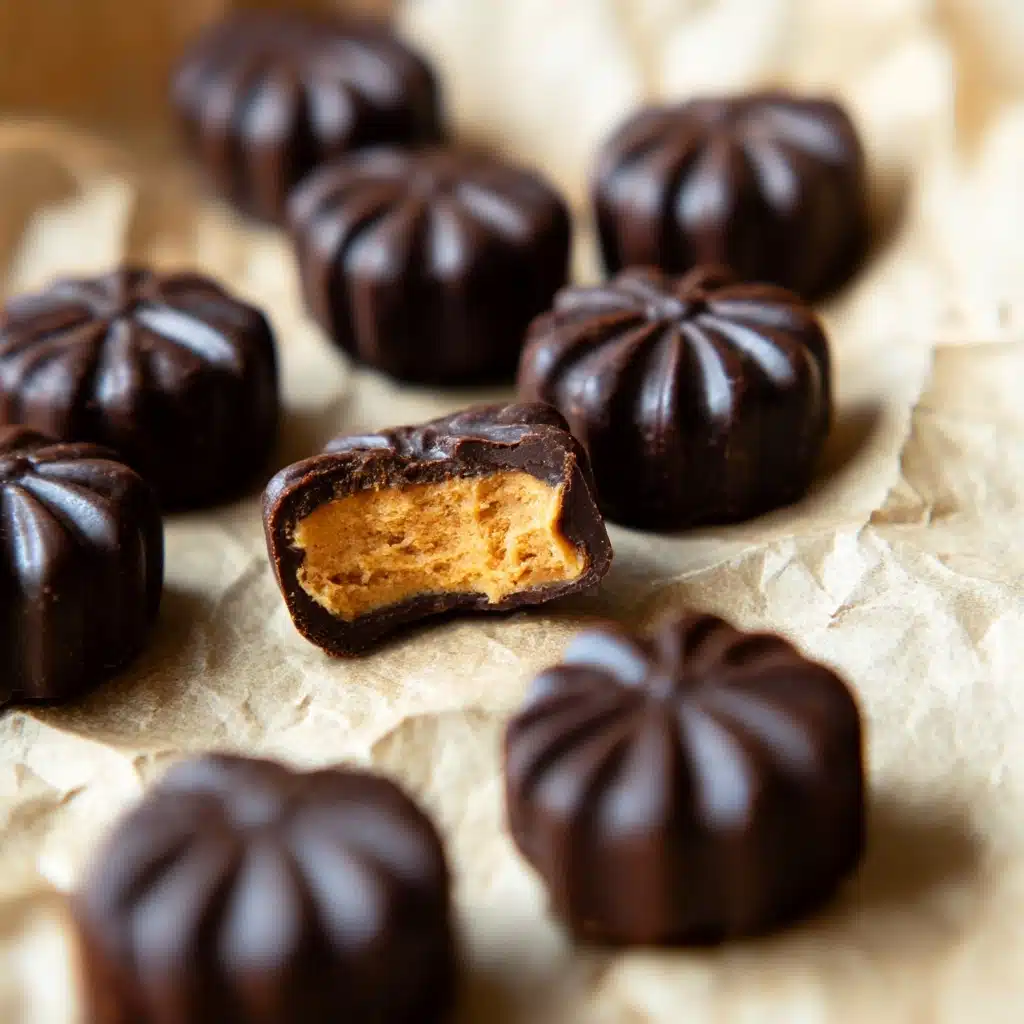
Chocolate Pumpkin Butter Cups (Dairy-Free) Recipe
If you’ve been searching for a delicious seasonal treat that combines the warmth of fall spices with the rich decadence of chocolate, look no further than these irresistible Chocolate Pumpkin Butter Cups (Dairy-Free). This delightful recipe offers a perfectly balanced blend of creamy pumpkin butter filling enveloped in silky, dairy-free chocolate layers. They are lovingly handmade and ideal for autumn gatherings, snack cravings, or guilt-free indulgence. Whether you’re dairy-free by choice or necessity, these butter cups will quickly become a cherished favorite thanks to their luscious texture and vibrant flavors.
Ingredients You’ll Need
Getting started is a breeze because each ingredient in this recipe is simple yet essential. These ingredients come together not only to create layers of flavor but also to give you that perfect balance of creamy, sweet, and spicy with a smooth chocolate shell.
- Pumpkin Puree: The star of the filling, providing natural sweetness, moisture, and vibrant orange color.
- Almond Butter: Adds smoothness and a nutty depth, but feel free to swap for any nut or seed butter you love.
- Honey: A natural sweetener that binds the filling ingredients while adding just the right amount of sweetness—you can also use maple syrup.
- Pumpkin Spice: A fragrant blend of cinnamon, nutmeg, ginger, and cloves that brings cozy warmth to every bite.
- Chocolate Chips: Dairy-free chocolate chips create a silky, melt-in-your-mouth coating that’s the ultimate complement to the pumpkin filling.
- Coconut Oil: Helps melt and smooth the chocolate for glossy, firm layers that set perfectly.
How to Make Chocolate Pumpkin Butter Cups (Dairy-Free)
Step 1: Prepare the Pumpkin Spice Filling
Start by warming the almond butter in the microwave for about 30 seconds to soften it up—this makes blending a dream. Then mix together the pumpkin puree, almond butter, honey, and pumpkin spice in a bowl. Whisk or use a hand mixer until silky smooth and perfectly combined. This luscious filling is what makes each bite a wonderful autumn escape. Set this aside while you get the chocolate ready.
Step 2: Melt the Chocolate
In a small glass bowl, combine your dairy-free chocolate chips with coconut oil. Microwave in 20-second bursts, stirring between intervals, until the mixture is fully melted and beautifully smooth. This rich chocolate will create the crisp outer shell that holds your creamy pumpkin butter filling—trust me, this layer is everything.
Step 3: Assemble the Cups
Pour a thin layer of melted chocolate into your silicone molds or mini cupcake liners. Pop them into the freezer for around 10 minutes to firm up. Once set, transfer the pumpkin spice filling into a plastic baggie and snip a tiny corner to pipe the filling evenly over the chocolate base. Freeze again for 5 to 10 minutes so the filling firms nicely. Finally, add a generous layer of melted chocolate on top, sealing the pumpkin filling inside. Freeze for 1 to 2 hours or until the entire cup feels firm to the touch. These little beauties are now ready to bring joy whenever you crave them!
How to Serve Chocolate Pumpkin Butter Cups (Dairy-Free)
Garnishes
Add an extra touch of fun and flair by sprinkling a pinch of cinnamon or pumpkin spice on top before the final freeze. For a festive twist, top each cup with a tiny whole nut or a dusting of finely chopped toasted pecans or pumpkin seeds. These garnishes add texture, visual appeal, and a mouthwatering aroma that invites you to dig in.
Side Dishes
Serve your chocolate pumpkin butter cups alongside a cozy cup of chai tea or warm almond milk spiced with cinnamon for an indulgent autumn afternoon treat. Alternatively, they pair beautifully with fresh fruit slices such as apples or pears, balancing richness with crisp freshness.
Creative Ways to Present
If you want to wow friends or family, arrange the butter cups on an elegant platter lined with autumn leaves or parchment paper. Gift them in cute little boxes or mason jars with rustic ribbons—perfect for holiday gifts or thoughtful surprises. Get playful and try layering the cups in parfait glasses with whipped coconut cream and crushed graham crackers for a dazzling dessert twist.
Make Ahead and Storage
Storing Leftovers
Keep your leftovers fresh and firm by storing these chocolate pumpkin butter cups in an airtight container in the freezer. This preserves their texture and flavor beautifully, allowing you to enjoy them at your convenience. While you can refrigerate them, just know the filling might soften and lose that signature firm center.
Freezing
Freezing is the best way to ensure your butter cups maintain their shape and texture. Simply place them in a freezer-safe container with parchment between layers to prevent sticking. They can stay in the freezer for several weeks, ready to pull out whenever a fall-inspired treat calls your name.
Reheating
There’s really no need to reheat these butter cups, but if you want the chocolate slightly softer, let them sit at room temperature for about 10 minutes before enjoying. Avoid microwaving, which can cause the filling to become too soft and the chocolate to melt unevenly.
FAQs
Can I use a different nut butter?
Absolutely! While almond butter is recommended for its creamy texture and mild flavor, you can use peanut butter, cashew butter, or even sunflower seed butter to cater to allergies or personal taste.
Is it possible to make these vegan?
Yes! Simply swap out honey for maple syrup or agave nectar to keep the recipe completely plant-based, while still enjoying that perfect sweet balance.
What kind of chocolate chips should I choose?
Look for high-quality dairy-free or vegan chocolate chips to ensure the texture and flavor are spot-on. Many brands clearly label their products as dairy-free, so that’s a good place to start.
Can I use regular cupcake liners instead of silicone molds?
Yes, mini cupcake liners work just fine! Keep in mind they might be less sturdy when frozen, so using a cupcake pan to hold them steady helps with easier assembly and storage.
How long will these last in the freezer?
Stored properly in an airtight container, these chocolate pumpkin butter cups should stay fresh for up to a month, making them perfect for batch preparation ahead of holiday seasons or special occasions.
Final Thoughts
These Chocolate Pumpkin Butter Cups (Dairy-Free) are a true celebration of fall flavors wrapped in luscious chocolate. They are simple to make, utterly satisfying, and so versatile—whether as a quick snack or a thoughtful gift. I encourage you to dive in and try these yourself; once you do, I promise they’ll become a beloved staple in your seasonal treat repertoire!
PrintChocolate Pumpkin Butter Cups (Dairy-Free) Recipe
Delight in these luscious Dairy-Free Chocolate Pumpkin Butter Cups, a perfect combination of seasonal pumpkin spice and rich chocolate that’s health-conscious and irresistibly creamy. This easy-to-make recipe uses almond butter and natural sweeteners for a wholesome treat ideal for fall or any time of the year.
- Prep Time: 10 minutes
- Cook Time: 10 minutes
- Total Time: 2 hours 20 minutes
- Yield: 12 cups 1x
- Category: Dessert, Snack
- Method: Freezing, Melting
- Cuisine: American
- Diet: Vegan
Ingredients
Pumpkin Spice Filling
- ½ Cup Pumpkin Puree
- ⅓ Cup Almond Butter (any nut butter or Sunbutter works)
- 2 Tablespoons Honey (or maple syrup)
- 2 Teaspoons Pumpkin Spice
Chocolate Layer
- 1 Cup Chocolate Chips (dairy-free)
- 1 Tablespoon Coconut Oil
Instructions
- Heat Almond Butter: Microwave the almond butter for about 30 seconds to soften it, making it easier to blend smoothly.
- Mix Pumpkin Spice Filling: In a bowl, combine pumpkin puree, honey, softened almond butter, and pumpkin spice. Whisk or use a hand mixer to blend ingredients until the mixture is smooth and creamy. Set aside for now.
- Melt Chocolate: Place chocolate chips and coconut oil in a small glass bowl. Microwave in 20-second intervals, stirring between each, until the chocolate is completely melted and smooth.
- Prepare First Chocolate Layer: Pour a thin layer of the melted chocolate into each cavity of a silicone candy mold or mini cupcake liner. Place the molds in the freezer for about 10 minutes to allow the chocolate to set firmly.
- Pipe Pumpkin Filling: Transfer the pumpkin spice mixture into a plastic baggie. Cut a small hole in one corner and pipe the filling evenly over the set chocolate layer in each mold. Return the molds to the freezer for 5-10 minutes to firm up the filling.
- Add Final Chocolate Layer: Pour the remaining melted chocolate over the pumpkin filling to cover it completely. Freeze the assembled cups for 1-2 hours until the chocolate topping and center are entirely firm.
Notes
- You can use any silicone candy mold or mini muffin liners if you don’t have pumpkin-shaped molds.
- For smaller cups, avoid filling molds completely to achieve thinner, more delicate layers.
- Store these treats only in the freezer to prevent melting and keep the pumpkin filling firm.
- Create a homemade piping bag by folding a plastic baggie so the zipper is on the outside, fill it with filling, then snip a tiny corner to pipe.
- Keep leftovers frozen in an airtight container; refrigerating may result in a softer center.
Nutrition
- Serving Size: 1 cup
- Calories: 110
- Sugar: 8g
- Sodium: 20mg
- Fat: 7g
- Saturated Fat: 3g
- Unsaturated Fat: 4g
- Trans Fat: 0g
- Carbohydrates: 11g
- Fiber: 2g
- Protein: 2g
- Cholesterol: 0mg
Keywords: Pumpkin spice cups, dairy-free dessert, chocolate pumpkin recipe, vegan pumpkin treats, healthy pumpkin snacks