Chubby Hubby Bars Recipe
Introduction
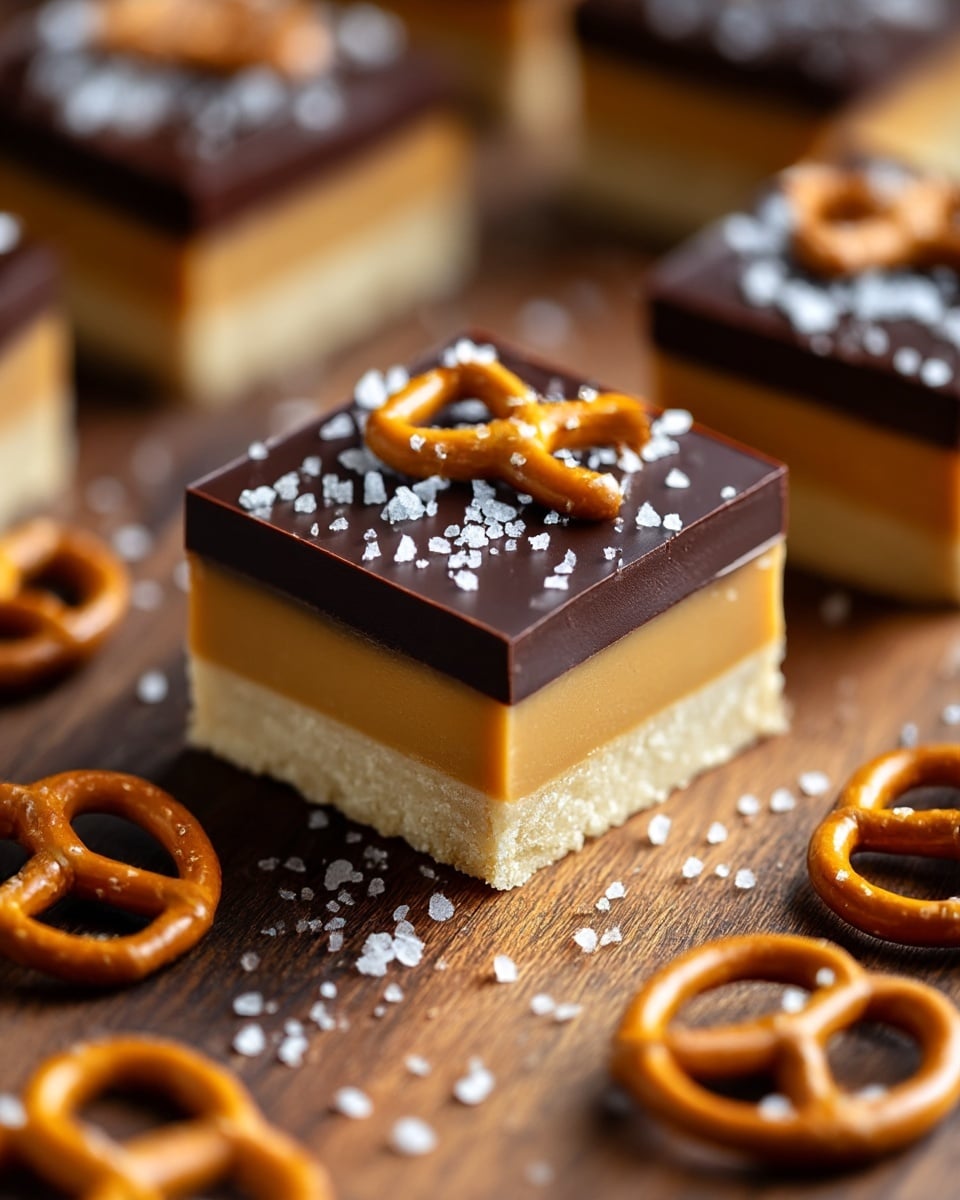
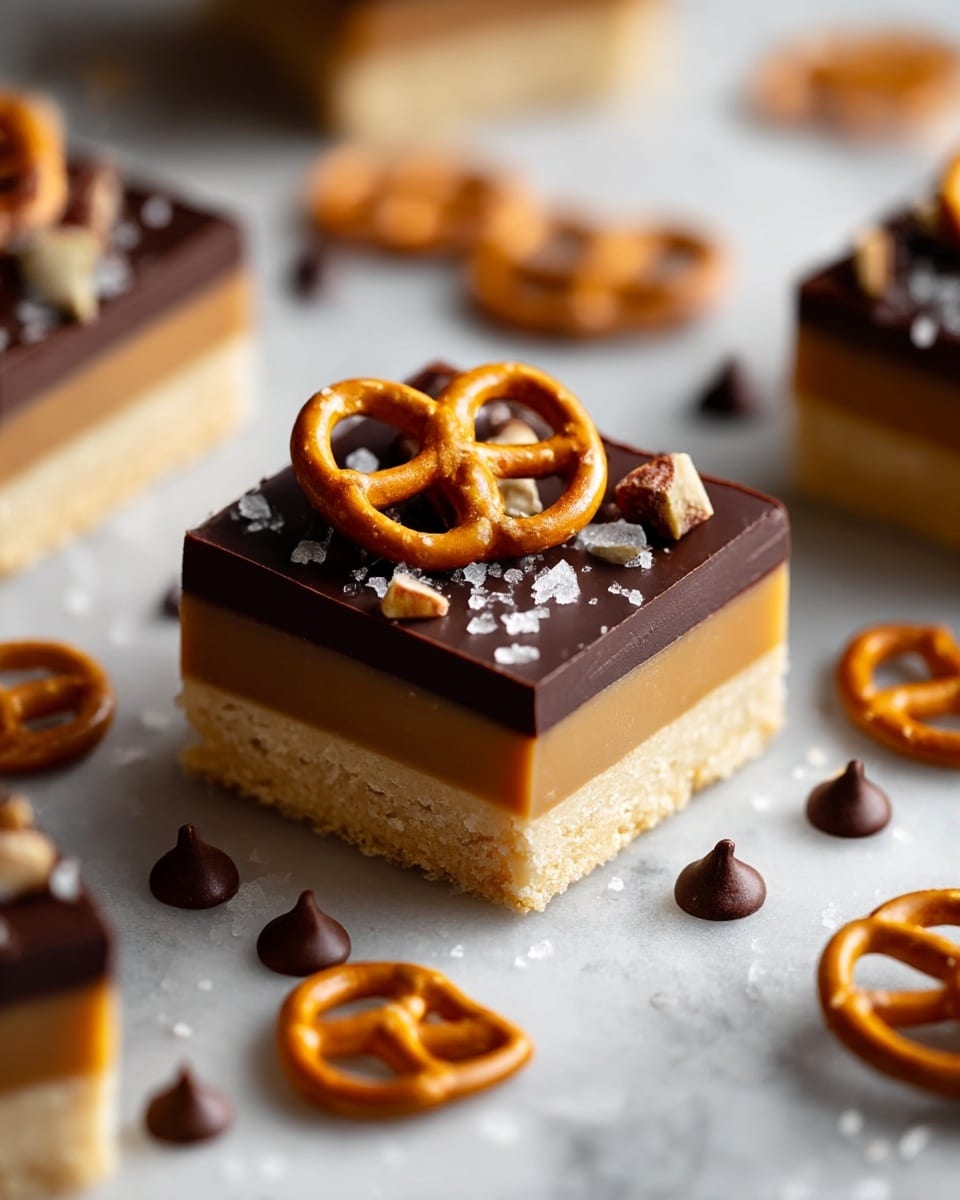
Chubby Hubby Bars are a delicious blend of sweet, salty, and crunchy layers that come together effortlessly. These no-bake bars feature a buttery graham cracker crust, creamy peanut butter filling, crunchy pretzels, and a rich chocolate topping. Perfect for satisfying any dessert craving!
Ingredients
- 2 cups graham cracker crumbs (about 12-14 crackers)
- 1/2 cup melted unsalted butter
- 1/4 cup granulated sugar
- 1 cup creamy peanut butter
- 1/2 cup powdered sugar
- 1/4 cup unsalted butter, softened
- 1 teaspoon vanilla extract
- 1 1/2 cups mini pretzels, broken into pieces (reserve some whole pretzels for decoration)
- 1 cup semi-sweet chocolate chips
- 1/2 cup heavy cream
- 1 tablespoon unsalted butter
- Sea salt flakes (optional, for garnish)
Instructions
- Step 1: Crush the graham crackers into fine crumbs using a food processor or by placing them in a zip-top bag and crushing with a rolling pin. In a medium bowl, mix the graham cracker crumbs, melted butter, and sugar until the mixture resembles wet sand. Press this firmly into the bottom of an 8×8 or 9×9-inch baking dish lined with parchment paper. Chill in the refrigerator for 15 minutes.
- Step 2: In a medium bowl, beat together the peanut butter, powdered sugar, softened butter, and vanilla extract until smooth and creamy. Spread this peanut butter filling evenly over the chilled crust using a spatula.
- Step 3: Roughly chop or break the mini pretzels into smaller pieces. Press these pretzel pieces into the peanut butter layer, making sure they stick but still maintain their crunch.
- Step 4: In a microwave-safe bowl, combine the chocolate chips, heavy cream, and butter. Microwave in 20-second intervals, stirring between each, until completely melted and smooth. Pour the chocolate mixture over the pretzel layer and spread evenly. Sprinkle sea salt flakes or additional crushed pretzels on top if desired.
- Step 5: Refrigerate the bars for at least 2 hours until firm and set. Use the parchment paper to lift the bars out of the pan, then cut into squares or rectangles. Serve chilled or at room temperature.
Tips & Variations
- Make sure the butter is softened when mixing the peanut butter filling for a creamy texture.
- Press the crust and pretzel layers firmly to help the bars hold together better.
- Use a sharp knife to cut clean slices after chilling the bars.
- For a nut-free option, substitute peanut butter with sunflower seed butter or cookie butter.
- Use gluten-free graham crackers and pretzels for a gluten-free version.
- Replace butter with coconut oil and use dairy-free chocolate chips for a dairy-free adaptation.
- Add chopped peanuts or toffee bits to the pretzel layer for extra crunch.
- Try milk or dark chocolate chips instead of semi-sweet for different chocolate flavors.
Storage
Store Chubby Hubby Bars in an airtight container in the refrigerator for up to one week. For longer storage, freeze the bars in a sealed container for up to three months. When ready to serve, thaw in the refrigerator and enjoy chilled or at room temperature.
How to Serve
Serve this delicious recipe with your favorite sides.
FAQs
Can I make Chubby Hubby Bars ahead of time?
Yes! These bars taste even better after chilling for a few hours, making them ideal to prepare in advance.
How do I prevent the layers from separating?
Press each layer firmly when assembling and allow the bars to chill long enough so the layers can bond together properly.
PrintChubby Hubby Bars Recipe

Chubby Hubby Bars are a decadent no-bake treat featuring a buttery graham cracker crust, creamy peanut butter filling, crunchy pretzel layer, and a silky chocolate ganache topping. Combining sweet, salty, and crunchy elements, these bars offer a perfect balance of textures and flavors ideal for satisfying dessert cravings with minimal effort.
- Prep Time: 20 minutes
- Cook Time: 0 minutes
- Total Time: 2 hours 20 minutes
- Yield: 12 bars 1x
- Category: Dessert
- Method: No-Cook
- Cuisine: American
Ingredients
For the Crust:
- 2 cups graham cracker crumbs (about 12–14 crackers)
- 1/2 cup melted unsalted butter
- 1/4 cup granulated sugar
For the Peanut Butter Filling:
- 1 cup creamy peanut butter
- 1/2 cup powdered sugar
- 1/4 cup unsalted butter, softened
- 1 teaspoon vanilla extract
For the Pretzel Layer:
- 1 1/2 cups mini pretzels, broken into pieces (reserve some whole pretzels for decoration)
For the Chocolate Topping:
- 1 cup semi-sweet chocolate chips
- 1/2 cup heavy cream
- 1 tablespoon unsalted butter
- Sea salt flakes (optional, for garnish)
Instructions
- Prepare the Crust: Crush graham crackers into fine crumbs using a food processor or by placing them in a zip-top bag and crushing with a rolling pin. In a medium bowl, combine the crumbs with melted butter and sugar, mixing until the mixture resembles wet sand. Line an 8×8-inch or 9×9-inch square baking dish with parchment paper and firmly press the crust mixture evenly into the bottom. Chill in the refrigerator for 15 minutes to set.
- Make the Peanut Butter Filling: Beat together peanut butter, powdered sugar, softened butter, and vanilla extract in a medium bowl until smooth and creamy. Spread this filling evenly over the chilled crust using a spatula.
- Add the Pretzel Layer: Roughly chop or break pretzels into smaller pieces. Scatter and gently press the broken pretzels into the peanut butter layer ensuring they stick but retain their texture.
- Make the Chocolate Topping: In a microwave-safe bowl, combine chocolate chips, heavy cream, and butter. Microwave in 20-second intervals, stirring each time, until the mixture is fully melted and smooth. Pour and spread this chocolate ganache evenly over the pretzel layer. Optionally, sprinkle sea salt flakes or additional crushed pretzels on top.
- Chill and Serve: Refrigerate the assembled bars for at least 2 hours until firm and set. Use the parchment paper to lift the bars from the pan and cut into squares or rectangles. Serve chilled or at room temperature.
Notes
- Ensure butter is softened for smooth peanut butter filling consistency.
- Press crust and pretzels firmly to improve layer adhesion.
- Use a sharp knife to cut bars cleanly once chilled.
- Store bars in an airtight container in the refrigerator for up to 1 week or freeze for up to 3 months.
- For nut-free version, substitute peanut butter with sunflower seed butter or cookie butter.
- Use gluten-free graham crackers and pretzels for a gluten-free adaptation.
- Replace butter with coconut oil and use dairy-free chocolate chips for dairy-free modification.
- Add chopped peanuts or toffee bits to the pretzel layer to enhance crunch.
- Swap semi-sweet chocolate chips for milk or dark chocolate depending on sweetness preference.
Keywords: Chubby Hubby Bars, no bake dessert, peanut butter bars, pretzel bars, chocolate ganache, sweet and salty bars