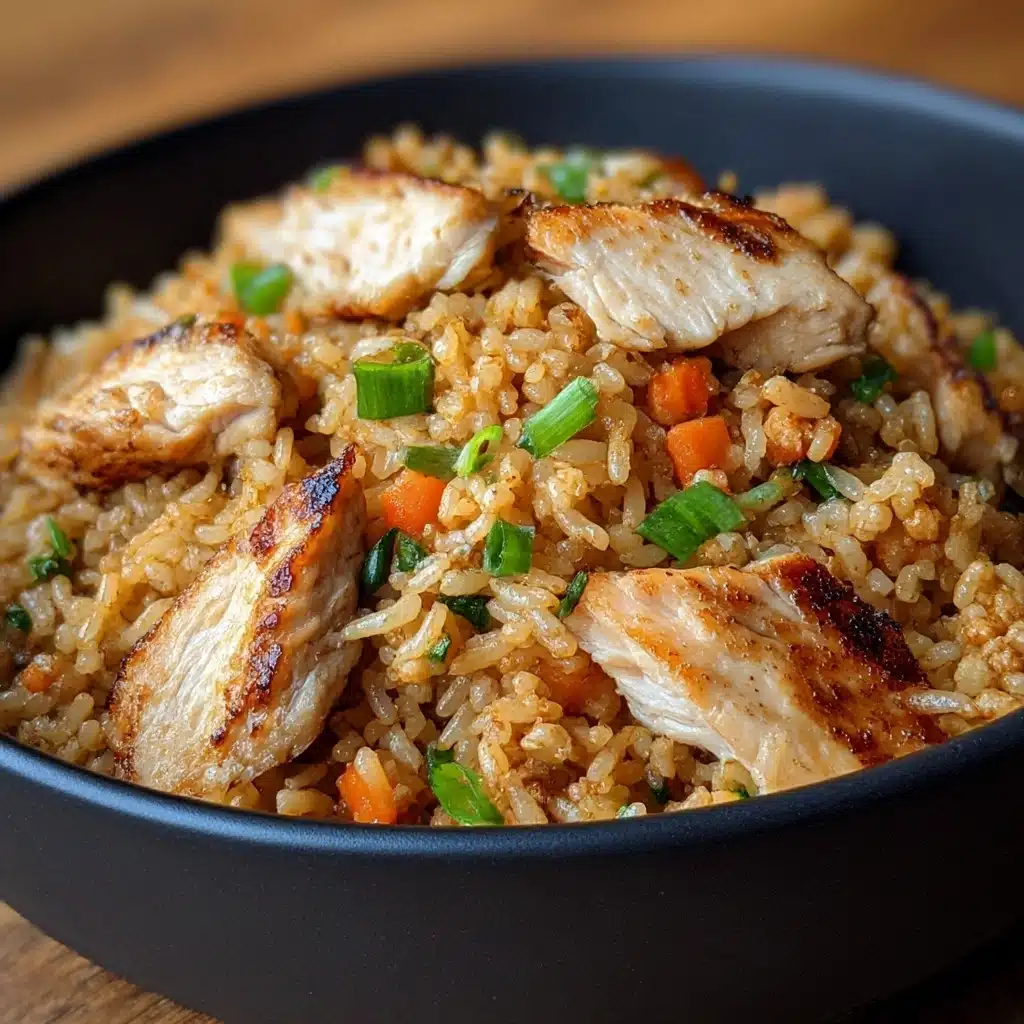
High Protein Crispy Garlic Chicken Fried Rice Recipe
If you’re craving a dish that brings together irresistible crunch, bold garlic flavor, and a punch of protein all in one bowl, then you’re absolutely going to adore this High Protein Crispy Garlic Chicken Fried Rice. This recipe combines tender, golden chicken with a medley of vibrant veggies and perfectly cooked rice, all tossed in fragrant garlic and savory sauces. It’s a quick, satisfying meal that feels like a special treat any day of the week, proving that comfort food can be both nourishing and downright delicious.
Ingredients You’ll Need
Keep it simple but essential! Each ingredient in this High Protein Crispy Garlic Chicken Fried Rice plays a crucial role, from the crispy chicken that packs the protein punch to the colorful veggies adding freshness and texture. Together, they create a harmony of flavors you’ll want to make over and over.
- Chicken breasts: Boneless and skinless, diced for quick, even cooking and that sought-after crispiness.
- Cooked rice: Day-old rice is ideal because it’s drier and prevents the dish from turning mushy.
- Sesame oil: Adds a rich, nutty flavor and helps bring everything together with a subtle crunch.
- Garlic cloves: Fresh minced garlic infuses the entire dish with its unforgettable aroma.
- Onion: Diced small, it softens beautifully and adds a sweet, savory base.
- Mixed vegetables: Peas, carrots, and corn bring color, sweetness, and a bit of crunch.
- Eggs: Lightly beaten and scrambled into the rice for added protein and silkiness.
- Soy sauce: The salty backbone of the flavor that ties the dish together perfectly.
- Oyster sauce (optional): Adds deeper umami notes for more complexity.
- Ginger (optional): Grated fresh ginger gives a subtle warmth and zing.
- Rice vinegar: Brings a gentle acidity that brightens the dish.
- Salt and pepper: To taste, balancing and enhancing all the flavors.
- Green onions: Chopped for garnishing, fresh and vibrant.
- Sesame seeds (optional): A crunchy, toasty garnish that finishes it off beautifully.
How to Make High Protein Crispy Garlic Chicken Fried Rice
Step 1: Prepare and Cook the Chicken
Start by seasoning your diced chicken breasts lightly with salt and pepper. Heating a tablespoon of sesame oil over medium-high heat, cook the chicken until it’s golden and crispy on the outside, about 7 to 8 minutes. Getting that crispy edge is key to upholding the “crunch” in the High Protein Crispy Garlic Chicken Fried Rice experience. Once cooked through, remove the chicken from the pan and set it aside to keep that delicious crispness intact.
Step 2: Sauté the Aromatics and Vegetables
Using the same skillet, add the remaining sesame oil and toss in the freshly minced garlic and diced onions. Sauté for a couple of minutes until fragrant and softened, letting those rich aromas fill your kitchen. Next, add the mixed vegetables—peas, carrots, and corn—to bring in texture and natural sweetness. Cook for another 3 to 4 minutes until the veggies are tender but not mushy.
Step 3: Scramble the Eggs
Push the veggies to one side of the pan creating a little cooking space and pour the lightly beaten eggs onto the empty side. Scramble them gently until fully cooked, then combine with the sautéed vegetables. This blending adds a creamy texture and an extra boost of protein, making the dish more wholesome.
Step 4: Incorporate the Rice
Add your pre-cooked rice to the skillet, breaking up any clumps with your spatula. Stir everything thoroughly to combine, letting the rice absorb the flavors and crisp up slightly. This step enhances the texture, giving you those coveted little crispy bits in every bite that truly define a great fried rice.
Step 5: Season and Flavor
Drizzle in soy sauce and optionally oyster sauce for that deep umami goodness, plus grated ginger and rice vinegar for extra layers of flavor complexity. Toss all the ingredients together to ensure every single grain of rice is flavorful and coated perfectly. The balance of salty, tangy, and savory elements here really makes this High Protein Crispy Garlic Chicken Fried Rice stand out.
Step 6: Combine Chicken and Final Heat
Return the crispy chicken to the pan and stir it all together to combine. Allow the mixture to cook for just a few more minutes so the chicken can meld with the rice and vegetables. This final step locks in the flavors and maintains the chicken’s satisfying crisp texture.
How to Serve High Protein Crispy Garlic Chicken Fried Rice
Garnishes
To make your meal pop visually and taste-wise, sprinkle chopped green onions and sesame seeds on top. These garnishes add a fresh crunch and a hint of nuttiness, complementing the garlic and soy-rich backdrop of the dish beautifully.
Side Dishes
This fried rice can definitely stand on its own but pairs wonderfully with light sides like a crisp cucumber salad or steamed bok choy to brighten up the meal. You might also enjoy it with a bowl of miso soup for a well-rounded Asian-inspired dinner.
Creative Ways to Present
For a fun twist, try serving the High Protein Crispy Garlic Chicken Fried Rice inside hollowed-out bell peppers or lettuce cups. Not only does it add a splash of color, but it also makes the meal feel festive and perfect for sharing with family and friends.
Make Ahead and Storage
Storing Leftovers
Place any leftover High Protein Crispy Garlic Chicken Fried Rice in an airtight container and store it in the refrigerator. It keeps well for up to 3-4 days, making it an excellent choice for quick lunches or dinners throughout the week.
Freezing
For longer storage, you can freeze the fried rice as well. Just portion it into freezer-safe containers and it’ll keep for about 1-2 months without losing too much quality. Be sure to thaw it in the refrigerator overnight before reheating for best results.
Reheating
When ready to enjoy leftovers, reheat in a skillet over medium heat with a splash of oil to revive the crispy texture. Alternatively, microwave in bursts, stirring between intervals until hot throughout. Adding a few drops of water before reheating can help keep the rice moist without becoming soggy.
FAQs
Can I use brown rice instead of white rice?
Absolutely! Brown rice works well and adds extra fiber and nutrients. Just keep in mind it might need a bit longer cooking time if you’re starting from scratch to ensure it’s tender before stir-frying.
How do I make this dish gluten-free?
Simply swap regular soy sauce with tamari or a gluten-free soy sauce alternative. Also, check your oyster sauce label or omit it to keep the dish free from gluten.
Is this recipe good for meal prep?
Definitely. The High Protein Crispy Garlic Chicken Fried Rice stores and reheats beautifully, giving you a delicious, protein-packed meal ready to fuel you for days.
Can I add more vegetables?
Feel free! Bell peppers, snap peas, or baby corn all make excellent additions if you want to increase those veggie servings and add more color and crunch.
What can I substitute for chicken?
To keep it high protein, you might use tofu, shrimp, or even diced turkey. Each alternative will bring its own unique taste but will work well in the fried rice concept.
Final Thoughts
This High Protein Crispy Garlic Chicken Fried Rice is a true crowd-pleaser that brings incredible flavor and satisfying texture to the table. Whether you’re cooking for a busy weeknight or aiming to impress friends with a homemade meal, it’s a recipe that hits all the right notes. Give it a try and I promise it’ll quickly become one of your go-to favorites too!
PrintHigh Protein Crispy Garlic Chicken Fried Rice Recipe

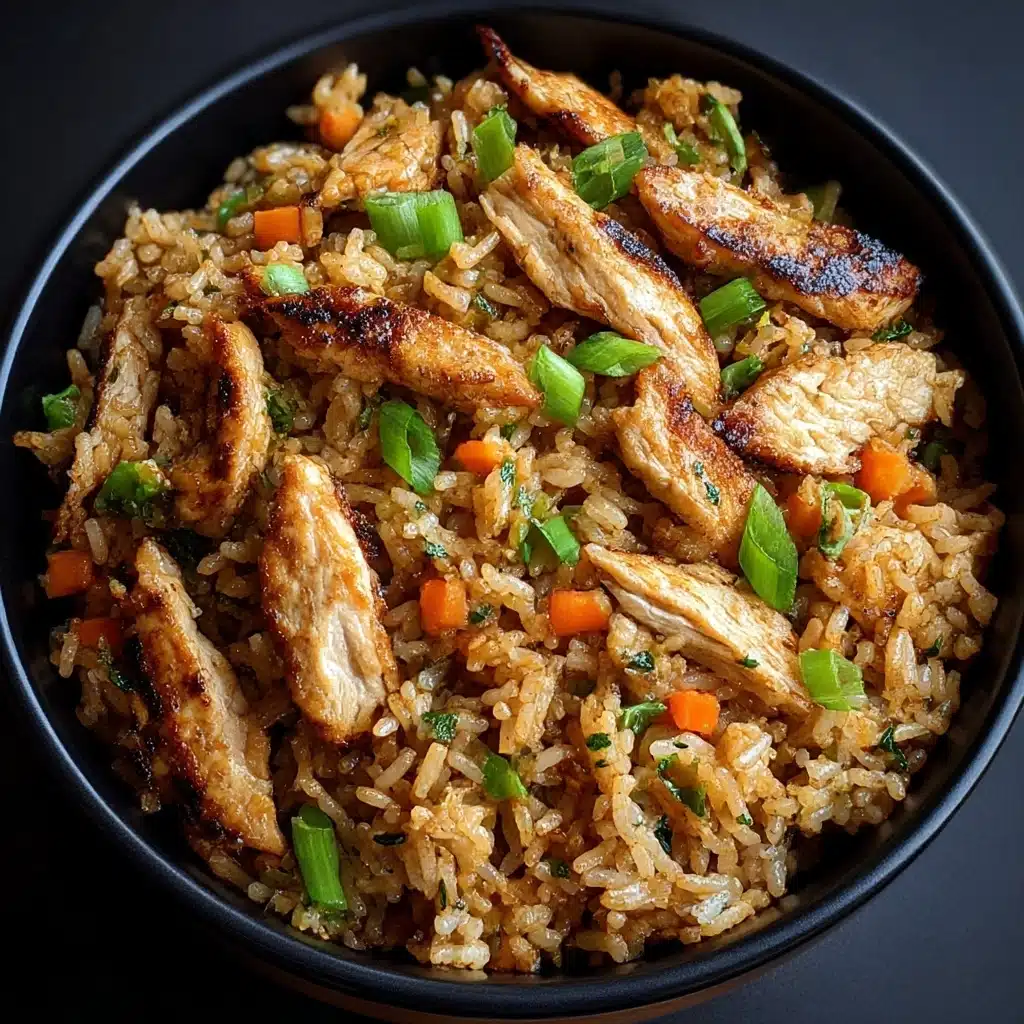
A flavorful and high-protein garlic chicken fried rice recipe that is crispy on the outside and packed with savory ingredients. This dish uses day-old rice for the perfect texture, sautéed garlic and onions for aroma, tender mixed vegetables for color and nutrition, scrambled eggs for extra protein, and a combination of soy and oyster sauces to enhance the umami flavor. Garnished with green onions and optional sesame seeds, this meal makes for a quick, satisfying, and balanced dish perfect for lunch or dinner.
- Prep Time: 15 minutes
- Cook Time: 20 minutes
- Total Time: 35 minutes
- Yield: 3–4 servings 1x
- Category: Main Course
- Method: Stir-frying
- Cuisine: Asian
- Diet: Low Fat
Ingredients
Chicken
- 2 boneless, skinless chicken breasts, diced
- Salt and pepper, to taste
Rice and Vegetables
- 2 cups cooked rice (preferably day-old for best texture)
- 1 cup mixed vegetables (peas, carrots, and corn)
- 4 cloves garlic, minced
- 1 small onion, diced
Eggs
- 2 eggs, lightly beaten
Oils and Sauces
- 2 tablespoons sesame oil (or vegetable oil)
- 2 tablespoons soy sauce (or tamari for gluten-free)
- 1 tablespoon oyster sauce (optional)
- 1 tablespoon rice vinegar
Optional Flavor Enhancers
- 1 teaspoon grated ginger (optional)
- 2 tablespoons chopped green onions, for garnish
- 1 tablespoon sesame seeds (optional, for garnish)
Instructions
- Prepare the Chicken: Season the diced chicken breasts with salt and pepper evenly to enhance flavor throughout the meat.
- Cook the Chicken: Heat 1 tablespoon of sesame oil in a large skillet or wok over medium-high heat. Add the chicken pieces and cook for about 7-8 minutes until they develop a golden brown, crispy exterior and are fully cooked through. Remove the chicken from the pan and set aside to keep warm.
- Cook the Vegetables: In the same pan, add the remaining 1 tablespoon of sesame oil. Sauté the minced garlic and diced onion for 1-2 minutes until fragrant and translucent. Add the mixed vegetables such as peas, carrots, and corn, and continue cooking for 3-4 minutes until they become tender but still retain some bite.
- Scramble the Eggs: Push the cooked vegetables to one side of the pan. Pour the lightly beaten eggs into the empty side and scramble gently until fully cooked. Once cooked, combine the scrambled eggs with the vegetables by stirring them together evenly.
- Add the Rice: Add the cooked rice to the pan, breaking up any clumps with your spatula. Stir the rice thoroughly with the vegetables and eggs, cooking for 2-3 minutes to allow the rice to warm through and develop a slight crispness on the edges.
- Season the Fried Rice: Pour in the soy sauce, oyster sauce (if using), grated ginger (if using), and rice vinegar. Toss all the ingredients to evenly coat the rice with the sauces and distribute the flavors throughout the dish.
- Combine Chicken and Veggies: Return the cooked chicken to the pan and stir well to incorporate it into the mixture. Let everything cook together for an additional 2-3 minutes to meld the flavors and heat the chicken through once more.
- Serve and Enjoy: Garnish the fried rice with chopped green onions and sesame seeds if desired. Serve immediately while hot and enjoy the crispy and savory goodness of this high-protein garlic chicken fried rice.
Notes
- For the best texture, always use day-old cooked rice as fresh rice tends to be too moist and clumps together.
- Oyster sauce is optional but adds a deeper umami flavor to the dish; omit it for a vegetarian version using plant-based alternatives for chicken.
- You can substitute sesame oil with vegetable or canola oil if unavailable, though sesame oil adds a distinctive aroma and flavor.
- Feel free to add additional vegetables such as bell peppers or broccoli for extra nutrition.
- Using tamari instead of soy sauce makes this recipe gluten-free.
Nutrition
- Serving Size: 1 cup
- Calories: 350
- Sugar: 3g
- Sodium: 600mg
- Fat: 12g
- Saturated Fat: 2g
- Unsaturated Fat: 9g
- Trans Fat: 0g
- Carbohydrates: 38g
- Fiber: 3g
- Protein: 28g
- Cholesterol: 125mg
Keywords: chicken fried rice, high protein fried rice, garlic fried rice, crispy chicken, Asian fried rice, quick dinner recipe, healthy fried rice