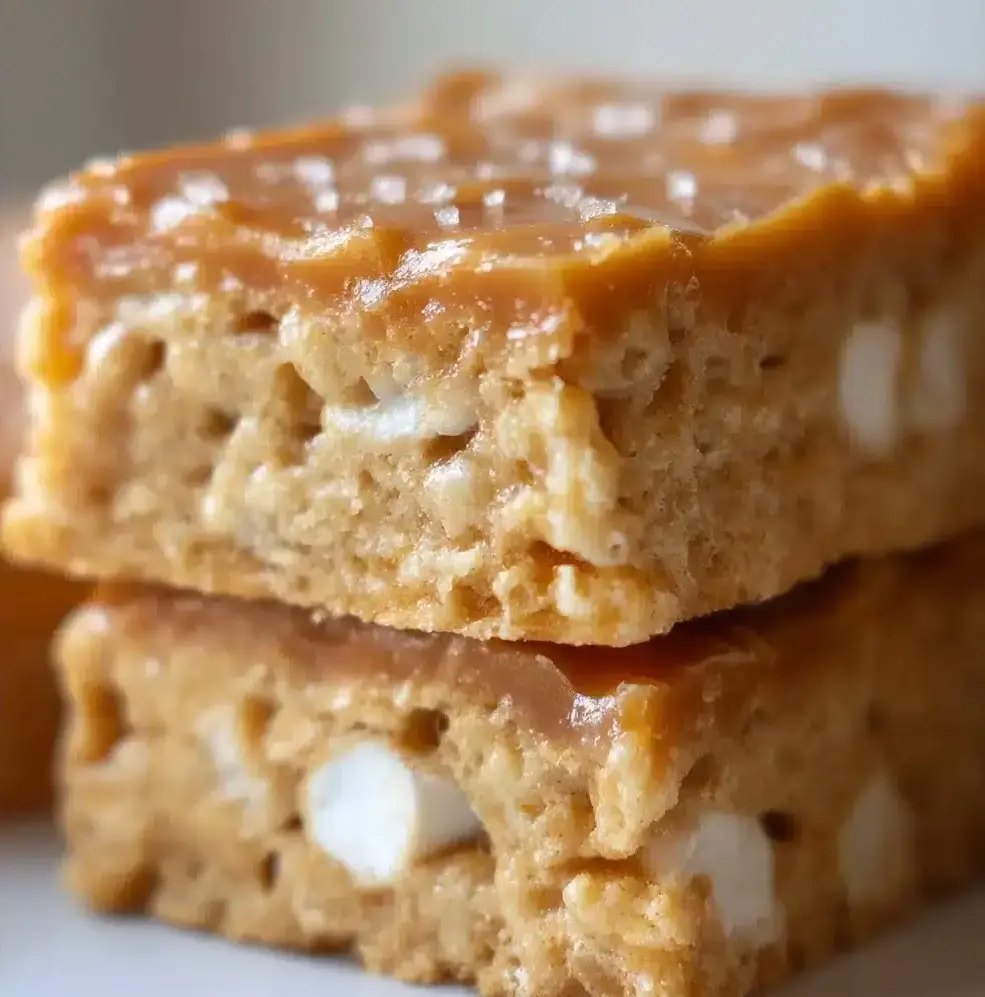
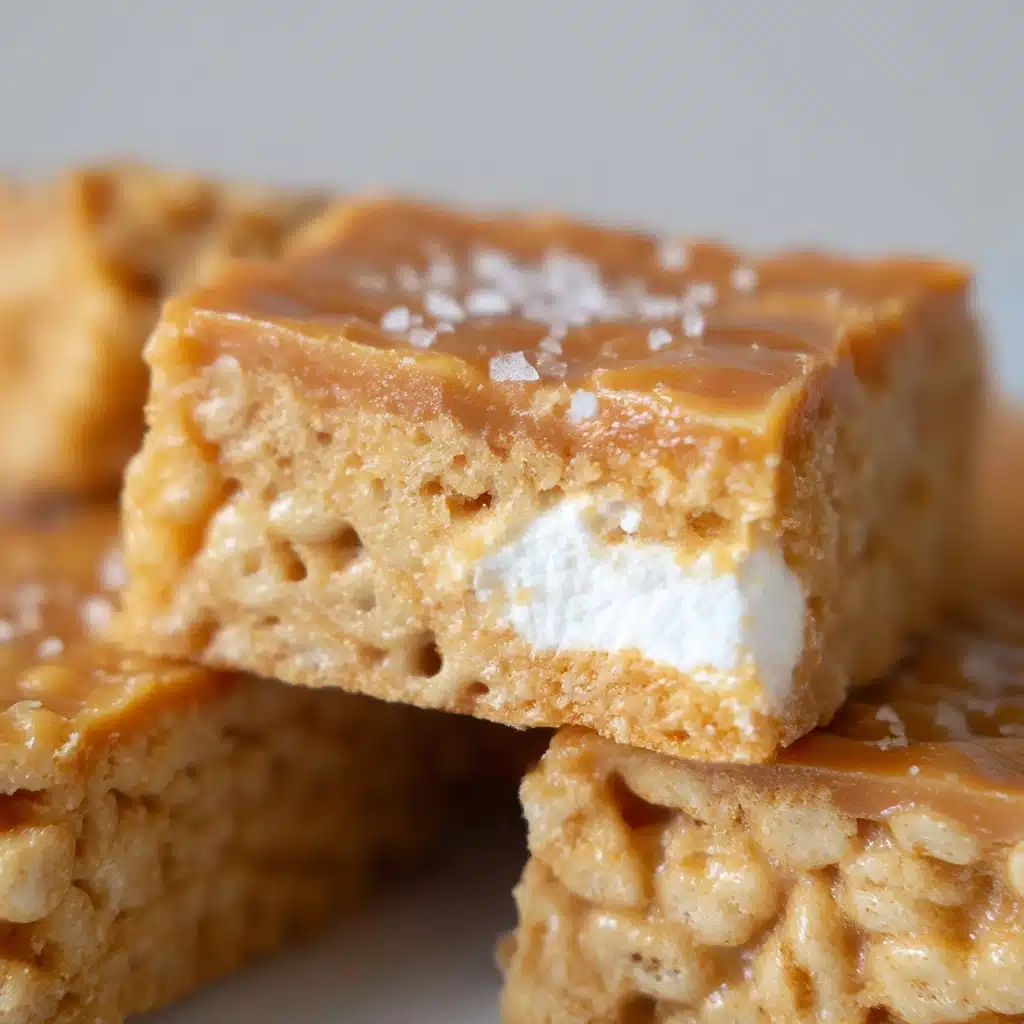
Salted Caramel Peanut Butter Rice Krispie Treats Recipe
If you love the nostalgic crunch of classic treats but crave a grown-up twist, these Salted Caramel Peanut Butter Rice Krispie Treats are about to become your new obsession. Imagine the perfect harmony of gooey peanut butter and marshmallow binding crisp, airy Rice Krispies, all luxuriously draped in a silky salted caramel layer with just the right touch of coarse sea salt. Every bite delivers a sumptuous blend of textures and flavors that make these bars irresistible for snack time, dessert, or anytime you want a little sweet escape.
Ingredients You’ll Need
Getting ready to make these Salted Caramel Peanut Butter Rice Krispie Treats is delightfully simple since the ingredients are straightforward but absolutely essential. Each one plays a starring role, whether it’s the creamy peanut butter bringing richness or the toasted caramel coating adding that addictive salty-sweet finish.
- 3 tablespoons butter: Provides a smooth base for melting marshmallows and adds a bit of richness.
- 6 cups mini marshmallows, divided: Four cups for binding and two cups for extra gooeyness and texture.
- 1/2 cup smooth peanut butter: Adds creamy nuttiness that elevates the classic Rice Krispie treat.
- 6 cups Rice Krispies cereal: The crisp, airy crunch that makes these treats so fun to eat.
- 2 tablespoons heavy cream: Helps achieve that smooth and glossy caramel topping.
- 11 oz Kraft caramels (1 package), unwrapped: The star of the show to deliver luscious, melted caramel flavor.
- 1 1/2 tablespoons coarse sea salt: Sprinkled on top for contrasting texture and the perfect salty finish.
How to Make Salted Caramel Peanut Butter Rice Krispie Treats
Step 1: Melt the Butter and Marshmallows
Begin by gently melting the butter over low heat in a large saucepan to avoid scorching. Stir in four cups of mini marshmallows until they dissolve completely into a sticky, smooth mixture that will bind your Rice Krispies beautifully.
Step 2: Incorporate Peanut Butter
Remove the pan from the heat and immediately fold in the peanut butter. Stir until it melts smoothly, creating a rich and creamy base that infuses your treats with that beloved nutty flavor.
Step 3: Mix in Rice Krispies and Remaining Marshmallows
Now, add the Rice Krispies cereal along with the remaining two cups of mini marshmallows. This step ensures each crispy bite has pockets of gooey marshmallow bliss. Mix until all the cereal is thoroughly coated and sticky with that peanut butter-marshmallow mixture.
Step 4: Press Into Pan
Transfer the mixture to a greased 9×13-inch pan and press it down firmly but gently. This helps the treats set evenly while maintaining some lightness so they’re not overly dense.
Step 5: Prepare Salted Caramel Topping
Place the unwrapped caramels and heavy cream into a microwave-safe bowl. Heat the mixture in 20 to 30-second bursts, stirring between intervals, until the caramel melts into a rich, velvety sauce. Pour this golden pool over the pressed Rice Krispie treats and spread with a spatula until mostly covered for that indulgent finish.
Step 6: Add Coarse Sea Salt and Cool
Sprinkle the coarse sea salt evenly over the caramel while it is still warm. This step is what truly transforms these into Salted Caramel Peanut Butter Rice Krispie Treats, balancing sweetness with a crunchy salty contrast. Let the treats cool completely to set before cutting into bars.
How to Serve Salted Caramel Peanut Butter Rice Krispie Treats
Garnishes
These treats are stunning just as they are, but adding a few extra touches can make them even more irresistible. Try drizzling melted dark chocolate over the top before caramel sets, or scatter chopped roasted peanuts to enhance the nutty vibe and add an extra crunch.
Side Dishes
Pair your Salted Caramel Peanut Butter Rice Krispie Treats with a scoop of vanilla bean ice cream for a dreamy dessert combo. They also go surprisingly well alongside a cup of strong coffee or a glass of cold milk, making for a balanced treat that satisfies both sweet and savory cravings.
Creative Ways to Present
For a party or gift, cut these treats into smaller bite-size squares and stack them on a pretty platter, tying the stack with a rustic ribbon. Or, press them individually into mini muffin liners and sprinkle with flaky sea salt for delightful handheld treats. Presentation is half the fun!
Make Ahead and Storage
Storing Leftovers
Store any leftover Salted Caramel Peanut Butter Rice Krispie Treats in an airtight container at room temperature. They will stay fresh and chewy for up to five days, making them perfect for making in advance of a gathering or simply enjoying over several days.
Freezing
If you want to keep these treats around longer, wrap individual bars tightly in plastic wrap and place them in a freezer-safe container or bag. They freeze beautifully for up to three months and thaw quickly when you’re craving a sweet snack.
Reheating
While these treats are typically enjoyed cold or at room temperature, if you prefer a warm, melty experience, microwave a single bar for about 10 seconds. The caramel topping will soften delightfully, but be sure not to overheat and lose that satisfying bite.
FAQs
Can I use crunchy peanut butter instead of smooth?
Yes! Crunchy peanut butter will add a bit more texture and nutty bursts throughout the treat, which many people love. Just be aware it may slightly change the smoothness of the binding mixture.
What if I don’t have Kraft caramels? Can I substitute?
You can definitely experiment with other caramel candies or even make your own caramel sauce. The key is to have a meltable caramel that mixes well with heavy cream for that silky topping.
Why do we add extra marshmallows after the cereal?
The additional marshmallows mixed in with the Rice Krispies add extra gooey pockets, making the texture more luscious and chewy rather than just crispy. It helps balance the crunch with softness.
Can Salted Caramel Peanut Butter Rice Krispie Treats be made gluten-free?
Absolutely! Just be sure to use gluten-free Rice Krispies cereal and check all ingredient labels to avoid any hidden gluten.
How can I ensure the caramel topping sets properly?
Make sure to allow the caramel to cool completely at room temperature before cutting the treats. Sprinkling coarse sea salt while it’s still warm helps the caramel hold its texture and adds that perfect salty finish.
Final Thoughts
There’s something undeniably magical about Salted Caramel Peanut Butter Rice Krispie Treats that brings joy with every bite. These treats combine the best of childhood memories with an adult’s love of sophisticated flavors, creating a snack that’s both comforting and exciting. If you’re looking to delight your friends, family, or just yourself, give this recipe a try and see how quickly these bars disappear. Trust me, you’ll be reaching for them again and again.
PrintSalted Caramel Peanut Butter Rice Krispie Treats Recipe

Indulge in these decadent Salted Caramel Peanut Butter Rice Krispie Treats, a perfect blend of crispy cereal, creamy peanut butter, gooey marshmallows, and luscious salted caramel. This easy-to-make dessert is a delightful treat for any occasion, combining sweet and salty flavors for an irresistible snack.
- Prep Time: 10 minutes
- Cook Time: 10 minutes
- Total Time: 20 minutes
- Yield: 24 bars 1x
- Category: Dessert, Snack
- Method: Stovetop melting and microwaving
- Cuisine: American
- Diet: Vegetarian
Ingredients
Main Ingredients
- 3 tablespoons butter
- 6 cups mini marshmallows (divided)
- 1/2 cup smooth peanut butter
- 6 cups Rice Krispies cereal
Salted Caramel Topping
- 11 oz Kraft caramels (1 package), unwrapped
- 2 tablespoons heavy cream
- 1 1/2 tablespoons coarse sea salt
Instructions
- Melt Butter and Marshmallows: In a large saucepan over low heat, melt the butter. Add 4 cups of the mini marshmallows and stir continuously until completely melted and smooth. Remove the saucepan from heat once done.
- Add Peanut Butter: Stir in the smooth peanut butter into the melted marshmallow mixture until fully incorporated and melted, creating a creamy base.
- Mix in Rice Krispies and Remaining Marshmallows: Fold in the Rice Krispies cereal along with the remaining 2 cups of mini marshmallows. Stir gently until the cereal and marshmallows are well coated with the peanut butter mixture.
- Press into Pan: Transfer the mixture into a greased 9×13-inch pan. Press down firmly and evenly to form the base layer. Set aside while preparing the caramel topping.
- Melt Caramel Sauce: Place the unwrapped caramels and heavy cream into a microwave-safe bowl. Microwave in 20-30 second intervals, stirring in between, until the caramels are completely melted and the mixture is smooth.
- Top the Treats: Pour the melted caramel evenly over the pressed Rice Krispie base. Use a spatula to spread the caramel until mostly covered. Immediately sprinkle the coarse sea salt evenly over the caramel.
- Cool and Serve: Allow the treats to cool completely until the caramel topping sets. Once cooled, cut into bars using a sharp knife and serve. Store leftovers in an airtight container for up to 5 days.
Notes
- For easier cutting, refrigerate the treats for 30 minutes before slicing.
- Use smooth peanut butter for a creamy texture; natural peanut butter may alter consistency.
- Adjust the amount of sea salt to your taste preference for a more or less salty finish.
- Microwave times may vary, so watch the caramel closely to prevent burning.
- Store the treats at room temperature in an airtight container to maintain crispiness.
Nutrition
- Serving Size: 1 bar (approx. 1/24 of recipe)
- Calories: 210
- Sugar: 18g
- Sodium: 150mg
- Fat: 8g
- Saturated Fat: 4.5g
- Unsaturated Fat: 3g
- Trans Fat: 0g
- Carbohydrates: 31g
- Fiber: 1g
- Protein: 3g
- Cholesterol: 15mg
Keywords: Salted caramel, peanut butter, rice krispie treats, marshmallow treats, easy dessert, sweet and salty snack